My Ombré Powdered Brows

During this lockdown, many of us bemoan the lack of access to our usual grooming fairies; yes, I am aware that’s the few of us who don’t have bigger worries like where the next meal is going to come from or how to pay next month’s rent, and missing one’s hairdresser and beautician appointments is a first-world problem, I do have some sense of perspective… Still, looking like yourself and not your cousin the bedraggled werewolf from Transylvania goes a long way in making one feel good, and these days, when we’re not sure if we’ll have wine to deal with tantrum number fifteen of the week on Friday (South Africa’s lockdown comes with restriction on what you can purchase, alcohol is not on the list…), anything that makes you feel better about this surreal new life should count for something…

Anyways, back on topic: I do miss my hairdresser and my nail artist, and I so need a facial, but there is one thing I am mighty chuffed I got done a few months ago: getting my brows shaded, which basically means tattooed, only a little softer and more modern. Before anyone scrunches their nose imagining 1990s-like arches drawn harshly in the wrong colour, I’ll post this here, because a picture is worth a thousand words… and then we’ll go back to what ombré brows are (little disclaimer: these pictures are from lockdown week 10, so it’s been a good three months since my last threading appointment, my brows look a little bushier than normal).

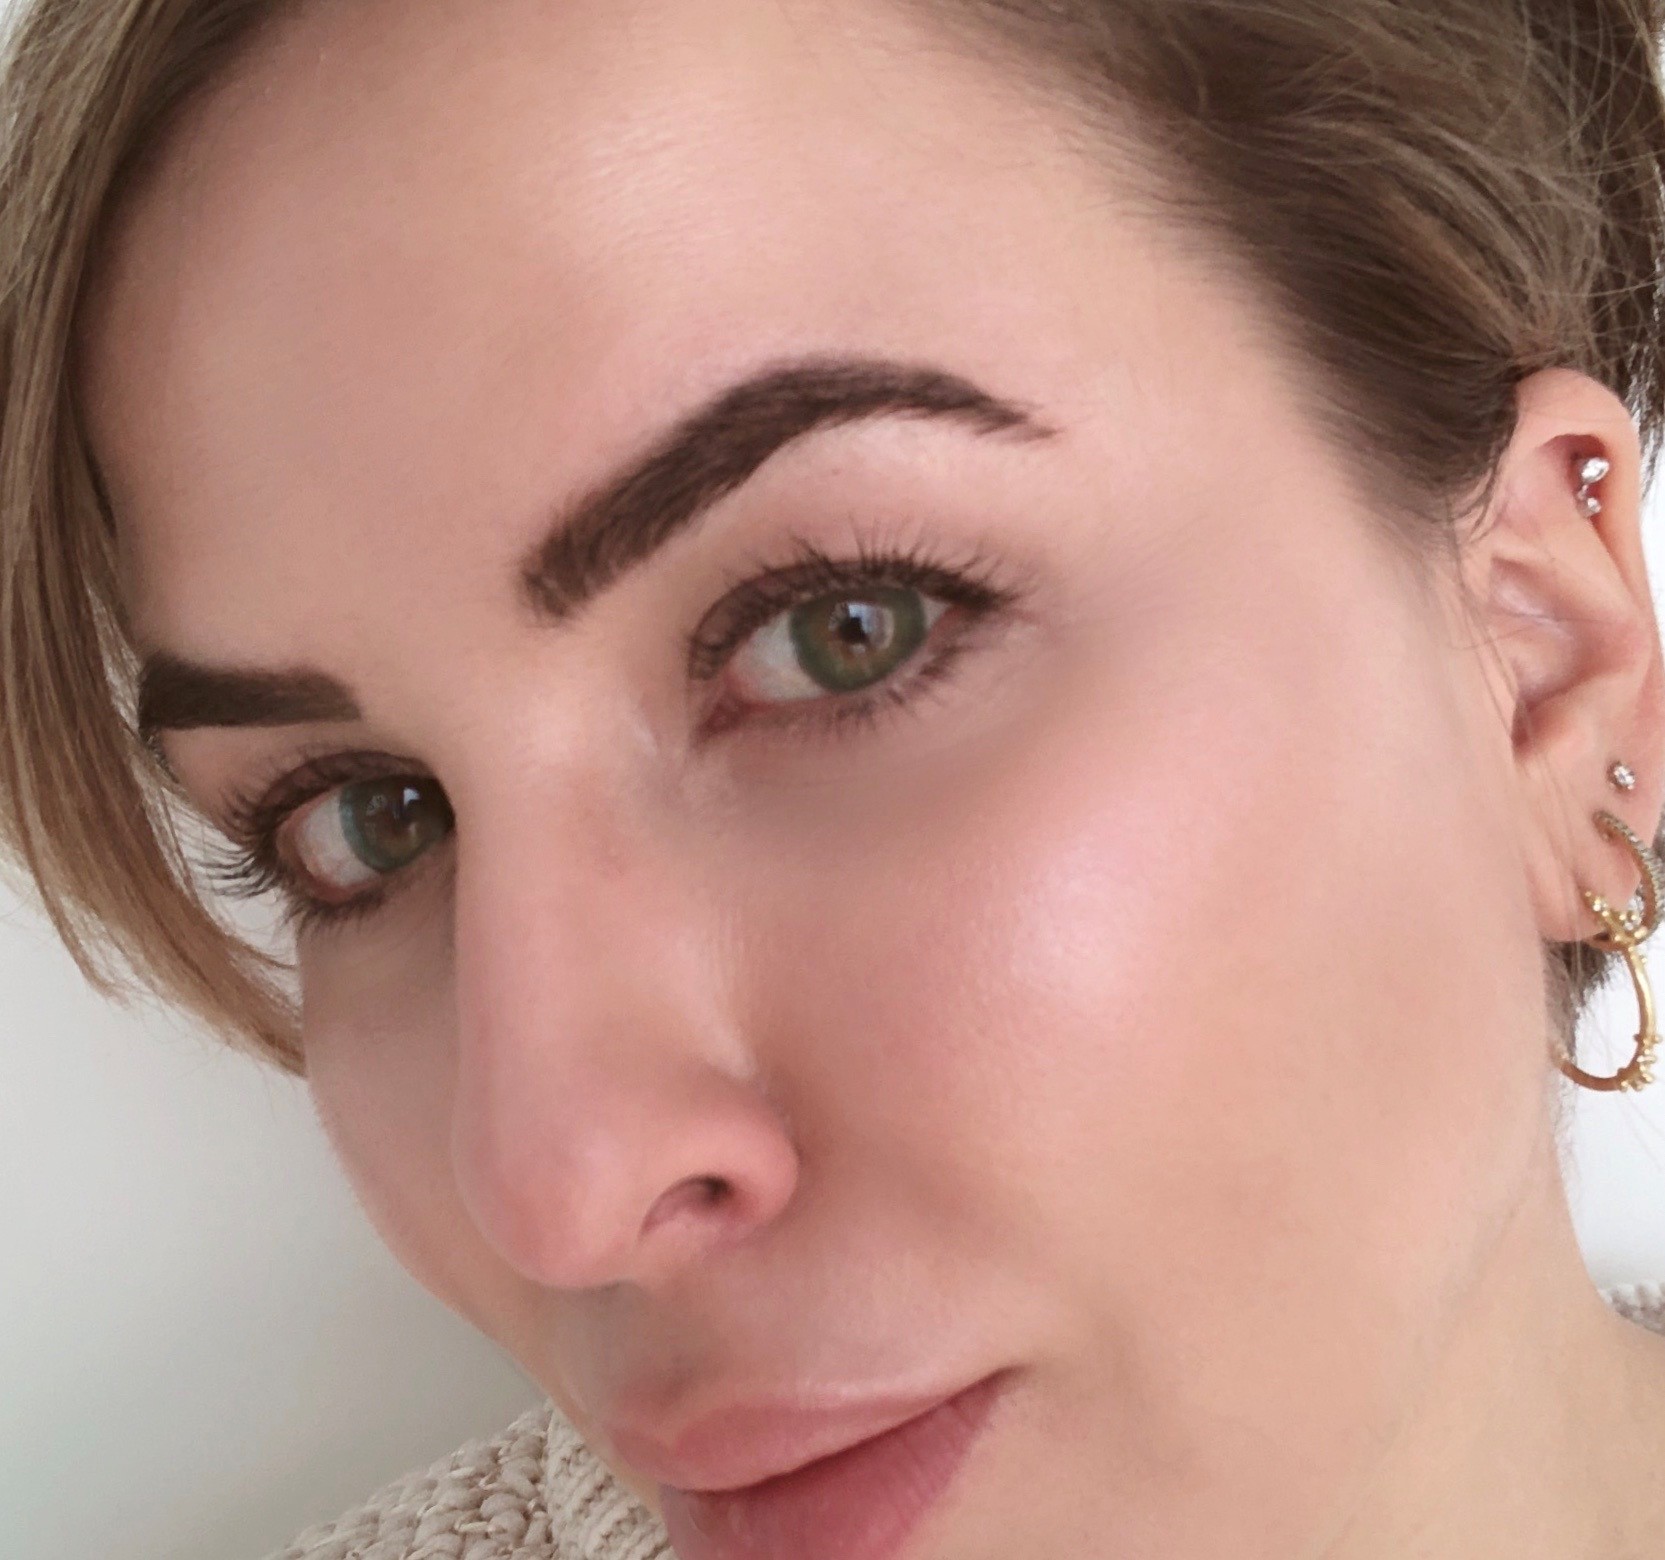
Ombré powdered brows have nothing in common with the harsh permanent make-up of before, in fact it is the is the newest brow shading technique: the amount of shading is 100% customizable (and buildable, so you can start small) and you can get as much or as little colour as you like, and your brows go from light towards the bridge to dark around the arch. This method creates pixelated dots with with no harsh strokes or outline. It is not the same as microblading which uses strokes on the arch to look like actual hair, creating a look that is, in my view, a little harsh and artificial.

I got mine done by Leandri at Mirror Mirror Studio in Sandton, and came in for a consultation and appointment one morning last August. The consultation is done the same day of the treatment so make sure to go in with photos of what you want and what you don’t like. Leandri is the sweetest girl ever, and she first got to explaining the process as she applied numbing cream onto my brows. As the cream was doing its work, she explained at length the aftercare and what to expect on each day to ensure the best results.

After about 30 minutes, she drew my brows precisely and that took another 30 minutes, something I was incredibly impressed with: Leandri is an artist who doesn’t cut corners, she wanted me to be totally happy with what the end result would look like. Then we went on to find the perfect pigment shade: I wanted something to match my natural hair, which is a dark ashy blonde, so she mixed a couple of colours until we found the right match.

I laid back down whilst Leandri started filling my brows in, something that took about 45 minutes per eyebrow. There is some minimal pain especially towards the end when the numbing cream effects start to wear off, but it’s bearable. The results are immediate, but, in order for the brows to stay in optimal shape, there is a huge aftercare list of instructions that you’re supposed to follow, and that is 50% of the process…

You’ll get out of the appointment with slightly sore brow bone, and you need to avoid getting your eyebrows wet for the first few days, instead you must clean them from day 2 with soap foam very gently and pat them dry with a clean tissue immediately to avoid messing up the pigment… You have to apply a Vitamin A cream over the brows daily to ensure they stay moisturized and try to avoid harsh scabbing (the scabs might take away the pigment, which is why everyone always needs a follow-up appointment, at about week 6 or 8). At about day 7-10, you can resume your usual skincare routine, but avoid harsh exfoliants, and of course no sun exposure and no facials etc. until your brows are healed. There’s a whole host of other things to avoid for the first few days, it’s quite the commitment… but whatever you do don’t apply make-up, rub, pick or scratch on the area, that will mess up your brow shape.

Besides the after care, the look of my brows was another thing I was a little put off by during the first few days: day 1 they looked fine, if a little dark, day 2 and 3 I had two hairy caterpillars across my face, they started scabbing lightly from day 4 (this is the itchy part, still, don’t scratch!) and when the scab started to peel off my brows looked a little light and a little patchy. At two weeks I had perfectly shaped and shaded eyebrows, with just a couple of spots where the scab had taken the pigment away and we needed to refill. Remember both brows won’t necessarily heal the same way, so one might need more of a touch-up than the other.

I went for my touch-up appointment at week 6, and Leandri patched up the little areas where I wanted a little more shadow, and a few more dots where I wanted them a little more defined. The aftercare following this appointment is the same as for the first one, so be patient. My brows are now more defined so need no make-up at all, it’s all very low maintenance after the brows are settled and I really recommend getting this done to anyone who likes a shaped brow look, although I still go for a monthly shaping appointment at my local brow bar, because the hairs still grow…

With love, S.

Barely there make-up in a flash

One of the good things about keeping a solid skincare routine and watching your sugar intake (I do, I do… most times… when not in lockdown…) is that your skin clears out and needs relatively minimal make-up. That being said, I also sleep very little, thank you anxiety and insomnia, and, whilst I’m all for a no make-up day or two on the week-end or on holiday, usually I believe in wearing a little bit of make-up just to make sure I look pert and fully awake, and I love the no make-up make-up look.

Seeing as I am an impatient in all things, I can’t see the point in long-winded make-up routines like the ones I see on my Insta feed. Contouring, baking, re-contouring, highlighting, drawing eyebrows, re-drawing the nose in a totally new shape… What a complete waste of time. On any given day I have at most 15 minutes to get my face on, and then I run down to my kitchen to pack my thermos of coffee and my smoothie for breakfast to drink on the way to work. I have this funny story from when I first moved to South Africa: I used to go to a gym for personal training; one day I was running late for a meeting so my trainer volunteered to order me a smoothie from the gym kitchen, and asked if he should have it ready in about one hour (based on what he was used to seeing from other clients), I said no, 25 minutes is plenty. He didn’t believe I would shower, get ready, hair, face and all in so little time… and in fact he stayed put to see if I would make it on time, and of course I did. So yes, at most, 15 minutes for make-up, that’s it.

Now, what do I do during those 15 minutes, you ask? For me it’s primarily about the skin: making it look as perfect as possible, in a way that’s difficult to notice where there is make-up vs where it’s only me.

Step One – Moisturize, moisturize, moisturize

I tend to avoid using a primer before make-up, especially the ones with silicone as silicone can make even the best foundations curdle… Instead I spend most of my morning skincare routine (which I’ve written about a few weeks ago) layering essence, serum, and treatment to ensure a well moisturized base. If my skin still feels a little parched or I have a long day ahead and I really need the make-up to last, then I reach out for a silicone-free primer for a smooth base, at the moment I’m liking the Perfecting Pure Canvas Primer by Laura Mercier (it uses water, algae and glycerin instead of silicone, and for some reason that doesn’t curdle), it has the light texture of a creamy gel and leaves my skin feeling just plumped and dewy enough for make-up, a bit like that of people who just “drink a lot of water” (sure, we all believe that).

Step Two – Bring on the concealer salad

On any given day, I use at least three different concealer products: over the years, I’ve decided that the areas of my face that need help don’t all need the same shade or texture. There’s the pigmentation spots from my pregnancies, the slightly blue-ish under-eye from lack of sleep and thinning skin (I’ll translate: I’m getting old) and even, if I’m really lucky, the odd little stress or hormone spot for fun… Under my eyes and to smooth out any lines that seem to be particularly visible, I opt for an illuminating formula; I always have a Touche Eclat in my handbag (who doesn’t) for travel and touch-ups but for everyday nothing gets close to It Cosmetics’ Bye Bye Under-Eye Illumination concealer in terms of result and stay power, and it doesn’t ever migrate into the fine lines (not that I have any, of course). For pigmentation and little imperfections I tend to mix a couple more creamy Ilia concealers for the perfect shade, and if I want a perfectly smooth eyelid I use the Eye Base by Laura Mercier. Application is by fingers first, then pushing into the little corners and creases with a small brush.

Step Three – Foundation with a twist

I don’t use foundation per se, most days that’s too much coverage for me. I only ever use foundation for special occasions (so basically I don’t). Most days, I’m happy with a CC cream, so long as it has a strong SPF (50+ is my norm) and my favourite for the past year has been the It Cosmetics CC+ Illumination Cream; it comes in 12 shades which helps find the perfect one, and I usually have two: one for tanned days one for very pale ones. I use the smallest amount: one pump is enough, and I mix it with a drop of face oil (the Farsali Rose Gold one works well for this), that’s the secret for super easy application. I do this with all liquid and cream foundations and it helps the product just glide into place. I pat it in with my fingers then use super soft feathery brushes with my foundation brush to blend it all in. Most days, that’s enough.

There are days when my skin feels like it will turn on the shine before I’ve even driven into the office parking… But I want glow, not shine… So to avoid any mishaps I use a very light powder to set my face in. I like the RMS Beauty “Un” Powder, and puff it on super lightly for a slightly matt but not too matt (it’s a thing, trust me, the perfect amount of matt vs glow) finish that isn’t really noticeable.

Step Four – Nobody likes to walk around with a flat face 

What makes faces interesting is cheeks, cheekbones, the arch of a brow, etc. In French we call it “le relief”. For that I bring in a tiny bit of contour by using a Match Stix by Fenty : it’s actually a matt foundation stick, matt is best for contour, and I buy a shade a good 4 to 5 tones up from my skin tone to create those shadows, by drawing a line by the jaw line, another just under the cheek bone (I go very lightly, the idea is shadow, not a Picasso sketch) and blending in with a soft brush. I use RMS‘ Lip2Cheek product for a little colour where I would normally blush and finish up with three dabs of Lumene‘s Instant Luminizer on my cheekbones, and again tap to blend… This step should really not be too scientific or take too long, it’s just about highlighting what is already there.

Step Five – Finishing touches

For everyday I go for very light definition. By that I mean if I use a liner it’s a smudged one in a shade of graphite, taupe, khaki or plum, never black. Most days I don’t and just give my lashes the star treatment with the best mascara ever created, Too Faced “Better Than Sex” (from personal experience I can confirm it is better than some sex), and finish off with a coat of a moisturizing lipstick or colour lip balm, seeing as I suffer from permanently dry lips. If I want an extra dewy look before I go I spray on a little E.L.F. setting mist and off I go.

By now you’ve realised that barely there make-up doesn’t translate into a one product does all approach. But I promise you if you use your fingers to warm the product into your skin and use the right brushes super lightly to blend everything in, it needn’t take hours. You’ll also notice that whilst some of the products I use claim to be all or mainly natural not all do, because whilst I value the natural approach to skincare and beauty I also do want results, and sometimes chemicals give you slightly better results than the natural ingredients that are meant to replace them… It’s ok, I also do not eat organic every day.

With love, S.